
Last Updated on 18th August 2021 by Sarah Sarsby
I love glass skin makeup looks and I love Fenty Beauty, so following Fenty Beauty’s glass skin makeup tutorial on Youtube seemed like a no-brainer.
You’re probably already very familiar with glass skin makeup. But for those that aren’t, the focus is on plump, glowy, and illuminated skin. It’s very much a ‘lit from within’ vibe. If you love dewy skin, this makeup trend is 100% going to be your thing.
Keep on reading to see the full Fenty Beauty glass skin tutorial, my recreation of the look, the products I used to achieve this radiant look, and my thoughts on it.
** This post contains some affiliate links. This means at no extra cost to you, I earn some commission if you purchase a product through my link. All thoughts are my own, though, as always. If you want to find out more, visit my affiliate disclosure page **
Fenty Beauty glass skin tutorial
Here’s the YouTube video I followed to achieve a glass skin look:
I’m honestly obsessed with the finished look. It’s glowy without being too shimmery or emphasising skin texture. Admittedly, it helps when you already have amazing skin like the model. However, the use of facial oils and focusing on your skincare first will ensure your makeup is smooth, glossy and doesn’t cling to any dry patches.
Skincare first
Before I delve into what makeup products I used to recreate this Fenty Beauty look, you need to focus on your skincare before anything else.
Here are my top tips:
- Use a hydrating serum to ensure your skin is plump and hydrated, which stops makeup from clinging to any dehydrated patches
- Add a facial oil to keep your skin nourished (if you tolerate facial oils), which encourages smoother makeup application
- Stay moisturised with your favourite moisturiser, as this will encourage that final glossy effect
- Wear SPF to keep your skin protected at all times
As they say: skincare first, makeup second. This is a good rule for applying makeup but particularly for glass skin makeup as it’s very skin-focused.
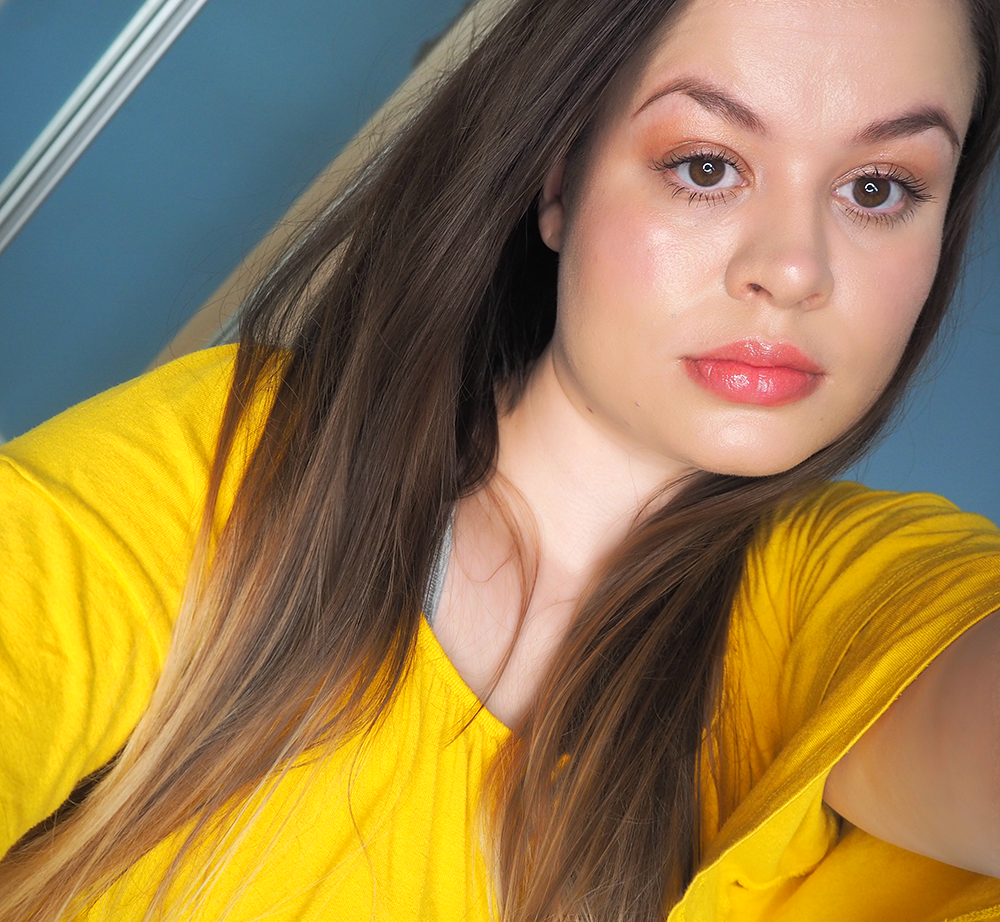
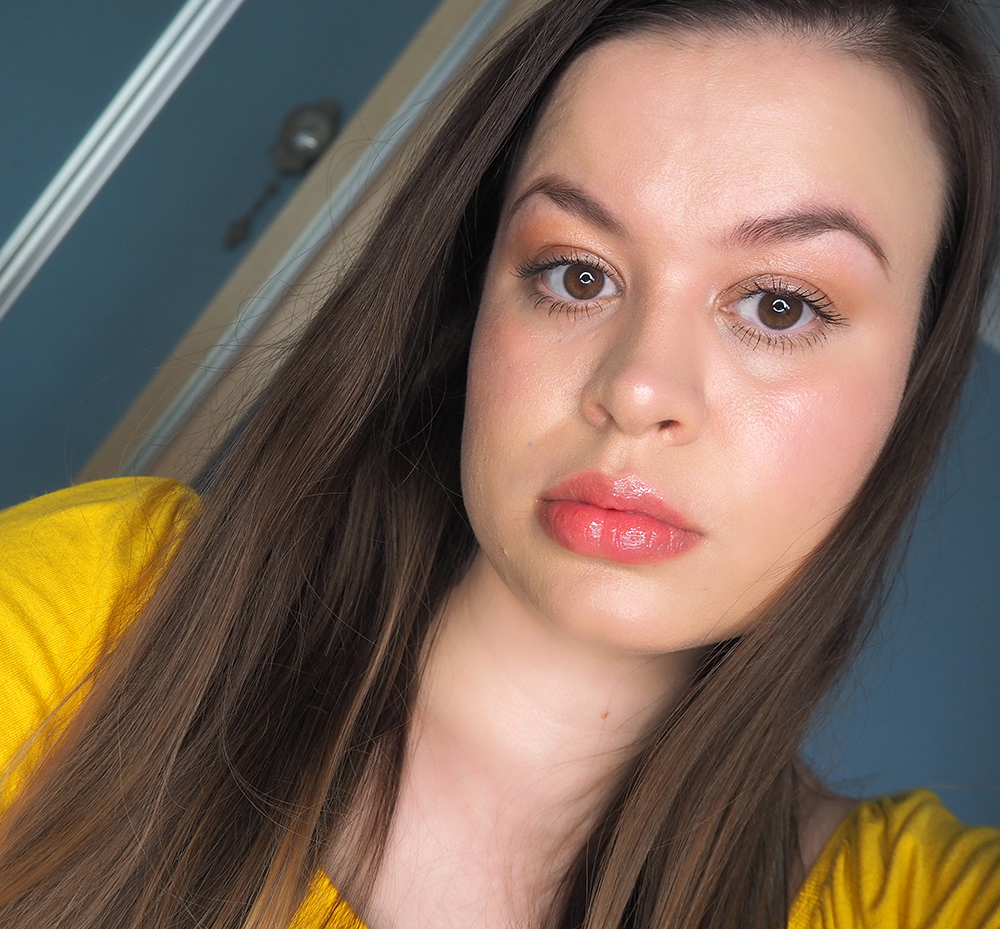
My recreation of the glass skin tutorial
Where Priscilla Ono, Fenty Beauty’s global makeup artist (who is fantastic btw), uses the Fenty Beauty Match Stix Shimmer Skinsticks underneath foundation to get the glow going, I took the OG Iconic London Illuminator in Original and applied this to the high points of my face. This means cheekbones, the bridge of my nose, chin, centre of the forehead, and up towards my temples.
Next, I took the same foundation Priscilla used in the tutorial – the Fenty Beauty PRO FILT’R Soft Matte Longwear Foundation in 140. Following the tutorial, I mixed this iconic foundation with a few drops of facial oil for a wet effect.
You can use any facial oil but I’d highly recommend using the Avant Skincare Advanced Bio Restorative Superfood Facial Oil. Although it’s pricey at £85, it’s one of the best facial oils I’ve ever tried. If you don’t fancy paying full price, Avant Skincare has a major 30% off sale coming on 20th August up until 5th September. This would bring the price down to around £60, making it more affordable. Honestly, you won’t regret it. Full review available here, if you’re interested.
I did my normal concealer and bronzer routine. I won’t delve into it because I want the focus of this blog post to be about glass skin.
Priscilla then goes on to mix together some powder highlighter with the facial oil she used with the foundation earlier in the tutorial. I took the same facial oil and mixed it in with my favourite ever powder highlighter – the Anastasia Beverly Hills x Amrezy Highlighter. I then applied this mixture across my cheekbones liberally for added glossiness.
Next, I took my Fenty Beauty Freestyle Cheeks Out Cream Blush in Petal Poppin’ and applied this to the apples of my cheeks and blended upwards lightly.
Finally, I finished my look with a dewy setting spray, lip gloss and shimmery eyeshadow, along with obvious products like brow pencil and mascara, to tie everything together.
My thoughts on the glass skin makeup look

When I tell you I’m obsessed with the results of this makeup look, I mean it. This is potentially the best my skin has ever looked. I love that it looks glossy not greasy.
The glow truly is multi-dimensional. Photos don’t do this makeup look justice. When my skin catches the light, it’s so radiant, without looking shimmery or textured.
Sometimes, using lots of highlighter can lead to emphasised skin texture, but mixing products in with facial oil was a genius move. It allowed the makeup to slip around more easily and ensured it didn’t cling to any dry patches.
The only negative is that using more facial oil led to the makeup breaking down a little faster than usual. Probably by 2-3 hours. However, because my skin already looked glossy, the breaking down didn’t look out of place at all with the rest of my makeup. There’s nothing worse than having an oily nose where the makeup has broken down but the rest of your skin looks matte.
Having a glass skin look made it easy for me to take a beauty blender and blend out any greasier parts of my skin back in with the rest of the overall luminous look.
I will 1000000% recreate this look again, maybe even at the weekend…
You have amazing skin to start with but woah, this looks amazing on you. I’ve never really thought to put highlighter on underneath my foundation, but it has worked so well!
You definitely should try it! I find mixing liquid highlighter with foundation works so well for added dewiness
You look glowy, natural and healthy. Id not heard of mixing powder highlighter with facial oil, as I’ve got both, i will give it a go.I think your skin needs to be in very good condition to carry off this look.
I think you’d love this look because you’ve got gorgeous skin! I do agree with you there. I also think people with particularly oily skin will find this look to be too much