
Last Updated on 24th August 2023 by Sarah Sarsby
What would you say if I told you you’d been hanging pictures wrong all your life? Believe it!
There’s a fresh, modern and super-easy way, to hang a whole wall’s worth of memories in literally minutes, without even so much as one nail in the wall — and it’s called TilePix.
** This post contains some affiliate links. If you want to find out more, visit my affiliate disclosure page **
What is TilePix?
TilePix.com offers the world’s first (and only) magnetic, customizable, 8×8-inch photo tiles. They’re easy to hang, adjust, swap or replace with no holes or damage to walls, for an Insta-perfect memory wall, every time. A TilePix gallery wall is like having your Instagram feed in real life!
Fell in love with a new design theme on TikTok last night? No problem; recreate it in minutes with TilePix, today… so you can show it off on Instagram (did someone say #bestdecorideas?).
Your new, custom TilePix arrive in a super cute (and very secure, protective) box, ready to hang (like your awesome BFF), and the magnetic pads just stick to walls for a hassle-free photo gallery. If you happen to have textured walls, they have a solution for that too. Smart!
Of course, you know I had to try them for myself and I’m happy to share my TilePix review here, with you, so you can decide for yourself if TilePix is the framed wall art solution you always needed (though, I’m pretty sure you’ll love them as much as I do). Read on for more on that.
You might be asking “what the heck is a ‘gallery wall?’” So let’s talk about that.
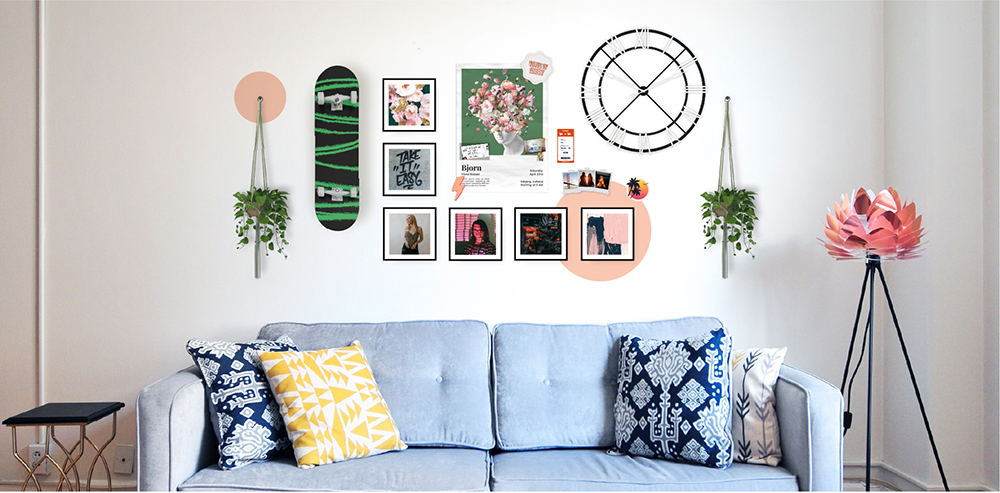
If you’ve been paying attention to home décor trends, it’s likely you’ve come across them. Maybe you called them a photo wall, a frame wall, an art wall or a memory wall. Whatever you call them, and no matter whether they feature incredible designs from your favorite Etsy indie artist, cherished family photos or those epic landscape shots from your last vacation, there’s a reason they’re popular: gallery walls make a great statement, they add personality to your space and bring a room to life in a customized, professional-looking, Insta-perfect kind of way.
TilePix is all about convenience
As beautiful as they look, perfecting the DIY gallery wall of your dreams can take some planning and be a bit fussy to put together; all the measuring and re-measuring… ugh. No thanks. That is, unless… you’ve already discovered TilePix’s super simple custom photo tile creator and the world’s first magnetic mounting system for framed photos that adheres to any wall surface! Just upload your photos, choose your image effects (if any), your photo mat and/or photo frame style and check out. They’ll usually arrive on your doorstep in a few days. How easy is that?
TilePix is super affordable
Starting at just $14 per tile (and as low as $9 per tile with my “friends of AWomansConfidence” discount, below), TilePix are great option for adding a fresh, glossy vibe to dorms, foyers, bedrooms, living rooms, staircases, apartment rentals, or just anywhere you want to make visual impact without ruining walls (or wasting time). If you’re looking to create your own easy, Insta-worthy photo gallery or memory wall without need for hammer, nails, screws or holes and without breaking the bank, then you’ll absolutely love TilePix for a convenient and stylish photo display that will have friends asking how you did it and asking where they can get theirs.

TilePix sells gift cards
Looking for a wedding gift, housewarming gift, Mothers Day gift or “congrats on moving into residence” gift for your favorite student?
These modern photo tiles make a trendy and welcome gift for students, newlyweds or anyone who would love to design their own memory wall and/or add stylish, personalized décor panache to their home or school dorm room. No matter the room size or space, there’s a TilePix gallery configuration to suit it.
Keep reading to learn more about what makes TilePix different, see my own photo gallery wall (spoiler alert: it looks awesome), hear about my online ordering experience at TilePix.com, and learn how to custom order your very own magnetic tiles in a few simple clicks (and save a load of cash while you do it).
Why choose TilePix?
Besides the ‘no nails, no holes’ benefit, the low cost per tile and the fact you can add to your memory wall over time (there’s even a subscription option where you get 9 tiles free; cool!), what I love about TilePix is the ease of updating the look of a space whenever the mood strikes. Mix ‘em up or swap ‘em out as trends or seasons change (think: holiday themed displays!) or just because, anytime you want a fresh look and feel for your space.
As a bonus, TilePix will ship your package free of charge (US only for now, sorry everyone else!). Same-day pick-up is available at any Walgreens nationwide for packages of 6 or less but I recommend collections of 9 or more for maximum “wow” factor. Free shipping to home is convenient and fast.
Other photo tile companies offer a tape system for sticking photos to walls, but TilePix has patented magnetic technology to revolutionize the home gallery experience. Magnets are simply more secure and make sliding your tiles into the perfect position easy without having to remove and re-apply if you make a mistake.
If you’re worried about the photo tiles looking unevenly spaced on your walls, don’t stress! TilePix sends you a free spacer tool to ensure your photos are perfectly spaced for a professional finish. Just stick your TilePix photo tiles to the mounting pad and then slide them into place et voila! Your perfect DIY memory wall, every time.
There are 3 frame colors to choose from: black, gray and white. Gray can’t be found anywhere else, so enjoy this exclusive option! Each frame gives your photos a sleek, modern and sophisticated look. They’re all designed to work with a huge variety of wall colors, textures and designs. For more information about which walls are suitable for TilePix, head over to the company’s FAQ page.
I love the image split option! As a cool and unique alternative to showcasing one single image per tile, image splits allow you to spread one image across multiple tiles for a truly creative effect. If you’re looking to really turn up the wow factor on your own memory wall and bring your images to life in a truly artistic way, consider the image split effect at TilePix.
TilePix makes creating image splits easy (just like everything else they do). Simply visit TilePix.com, upload an image and follow the instructions for your perfect image split.
Detailed steps are below for how to order your own photo tiles, including how to split an image.
My personal experience with TilePix.com (and why I’m love with my personalized photo gallery memory wall)

First, the ordering process is uber simple. After uploading my photos to TilePix.com, I chose my configuration options (black frame, picture filled to the border, images in color, and no image split), and checked out in just a few minutes. The website is easy to navigate, and there are some helpful videos if you want to learn more about TilePix.
I couldn’t wait to build my memory wall with my brand new TilePix once they’d arrived! My photo tiles came neatly packaged, with no scratches, breaks or chips. All of the packaging is recyclable too, which is a big bonus!
Before I hung my photo tiles, I wiped down my walls with a clean, damp cloth, as instructed. I let the walls dry naturally, which took about 2 hours. This is to ensure the pads stick securely to your walls.
After unboxing my TilePix, I took out the magnetic wall pads. One side is magnetic, and the other side has a peel-and-stick system. I peeled the backing off to reveal the sticky layer and pressed this onto the wall for 30 seconds. Then, I simply pressed my photo tile to the pad. It literally clicks into place, which is both satisfying and convenient.
Even if your magnetic pads are stuck slightly off-mark or don’t align exactly how you hoped, you can still stick and slide the tiles into position so your photo gallery memory wall looks evenly spaced for that flawless, professional photo display you planned for. This is great for careless people like me, as it allows for a margin of error when sticking the pads to the wall.
To ensure I got even spacing between each photo, I used the handy spacer tool that comes with every TilePix order. Again, this just makes the whole process stress-free for a perfect photo wall.
I’m obsessed my own personalized photo wall. The images are all high quality, glossy and special to me, and the gallery looks fantastic (if I do say so, myself). I chose black frames to stand out against my white walls for a stunning contrast, and I love the end result. Modern, minimalist, sleek and chic!
And the best part is, if I feel like swapping the images around in a different order, I can! All I have to do is click the tiles in place and voila – a brand new layout! Also, if I move homes, the pads are removeable, so I can pack my photo tiles with me, and simply hang them up in the new place.
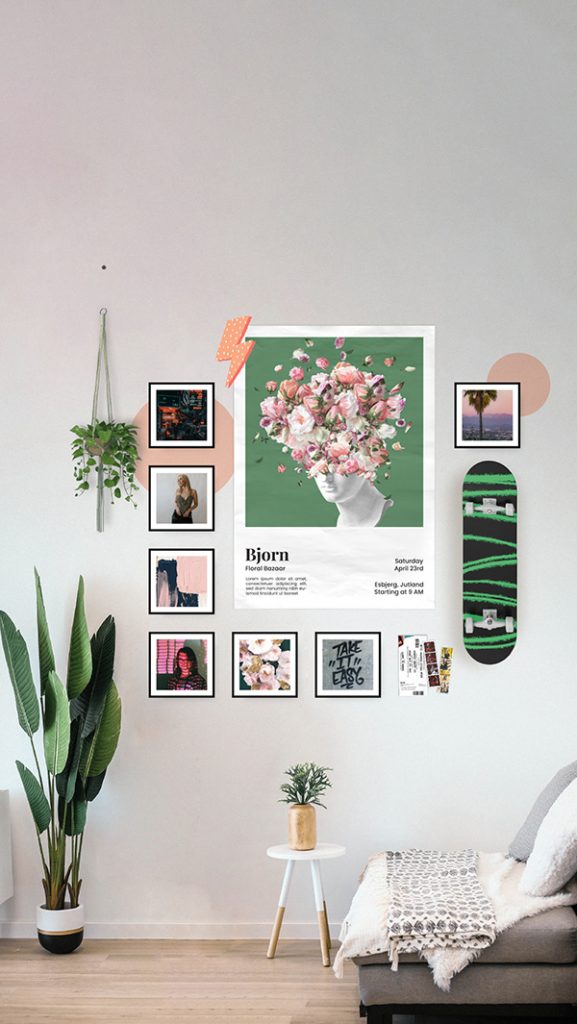
See what my photo gallery wall looks like below:
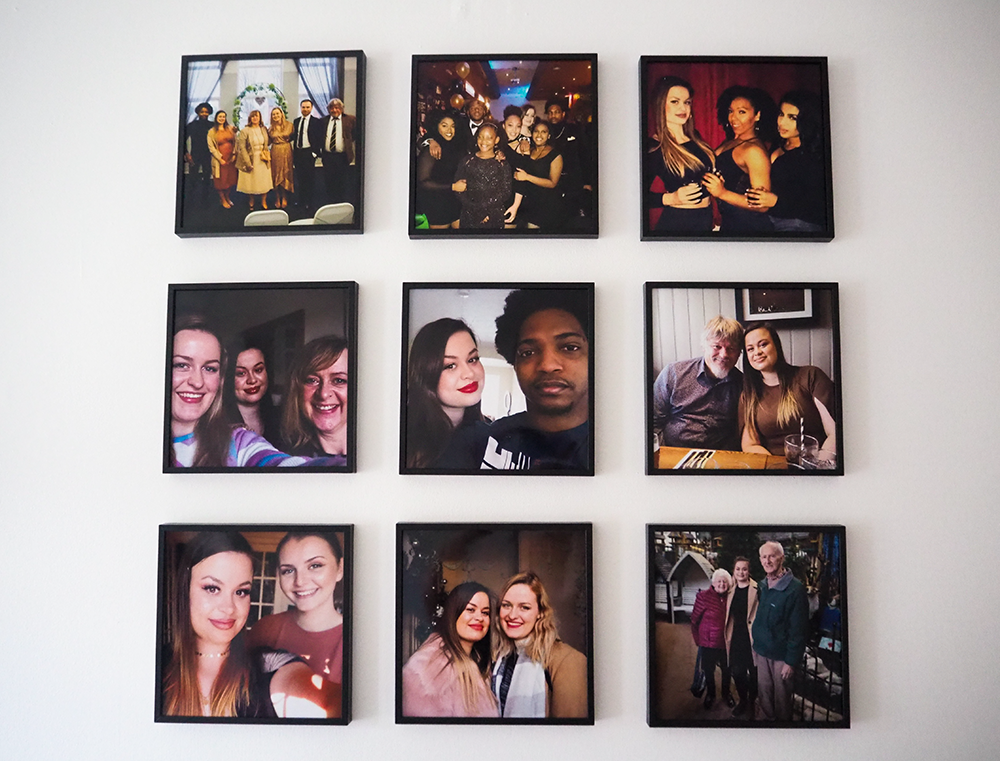
It’s so pretty, right? I couldn’t be happier with my TilePix!
I got 9 tiles and the whole hanging process took about 15 minutes. You could do this faster, likely, if you have good eye for detail. I wanted to take my time to ensure I got the best results. It honestly looks like I spent ages putting this gallery wall together when it realistically took hardly any time at all. I won’t tell if you don’t. 😉
How to order your very own magnetic photo tiles
Head over to TilePix.com and follow the steps below to order your own photo tiles quickly and easily:
- Click the “Get Started” button on the homepage
- Select how many photos you’d like to upload (this will be the number of tiles you order). If you’re going for an image split, just select 1 image
- Next, select your frame color and whether you want your image to fill the entire tile. There are options to have a white or gray border around your photo, so the image doesn’t fill the entire space
- Decide whether you want your image(s) to be in color or black and white
- If you’re going for an image split, select the “Splits” option. Move the sliders on either axis to add or remove rows and columns. If the sliders turn red, the maximum resolution of the image has been reached. Tap or click the image and pinch to reposition and zoom. When done, tap or click anywhere
- Save your changes, add your finished photo design(s) to your basket, and checkout (use code CONFIDENCE for 35% off your first order – click here to visit TilePix now)
It’s as simple as that!
Pricing options and shipping details
TilePix unfortunately only ships within the US right now but for those in the US, shipping is always free. TilePix also offers free same day pick up at any Walgreens on orders of 6 tiles or less.
Tiles start at $14 per tile. However, the more you buy, the more you save! For example, if you purchase 20 tiles or more, you could save 20% on your entire order.
Final thoughts on TilePix.com
I love my own photo gallery memory wall. The ordering process was fast and easy, my wall looks beautiful with high-quality photos, and the magnetic mounting system is genuinely innovative.
If it wasn’t for TilePix, I wouldn’t be able to have my own photo gallery, as I’m currently renting and my rental agreement prohibits me from putting holes in walls. Having TilePix as an option has truly made my living room feel more cozy and homey and inviting.
I don’t think I’d ever go back to the traditional way of hanging up photos with this super convenient and highly effective method. Thanks, TilePix!
Ooooh wow, I love how this looks! Super pretty. 🙂
Thank you! It’s such a cool and simple idea, but still super impactful and creative. I love how my gallery wall looks 🙂